Light switches can often sit undisturbed on the wall for decades. But when it’s time to update the house and refresh the fittings, how difficult is it to swap out an old switch for a new one?
The answer, it turns out, is “not difficult at all.” But as with most home improvement tasks, there’s more to changing a light switch than just unscrewing the old one and screwing in the new one. Here’s a step-by-step guide to fitting a light switch.
Tools and materials you’ll need:
· Pliers
Once you are armed with the right tools, follow our step-by-step guide to learn how to replace a light switch.
8 steps to changing a light switch UK edition
1. Turn off the power
The first step in learning how to fit a light switch is to turn off the power to the switch at your home’s fuse box or circuit breaker. This is essential, as working with electrical wiring can be dangerous. You should be able to identify the trip that protects the circuit for your lights. Turn this off. You should see an indicator window that will show green.
If you are in any doubt, remove the appropriate fuse, or turn off all power to the property
2. Check the power is off
Test that the power has been turned off using a multimeter or voltage tester on the exposed wires. If the power is off, the tester will not light up.
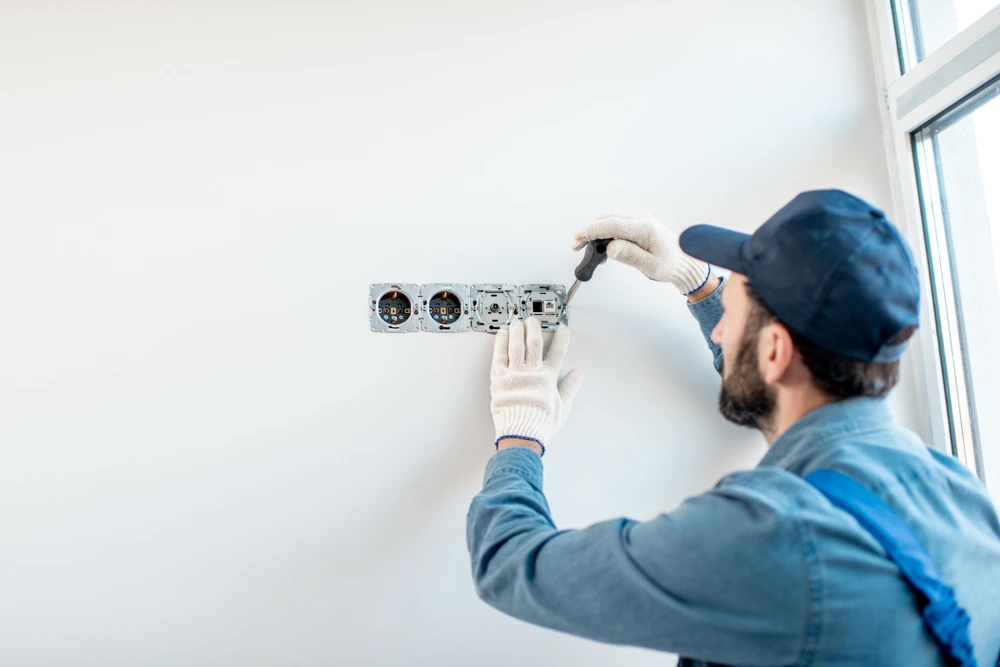
3. Loosen the switch faceplate.
Unscrew the switch plate from the wall and remove it. You should now see two screws holding the switch in place. Unscrew these and carefully pull the switch out of the electrical box. The wires behind the socket will be very stiff, and you may find it easier to pull the wire through by gripping it with your pliers.
4. Make a note of the position of the wires
Take a close look at the wires and note which one is connected to the Earth terminal (this will usually be green or bare copper). The colours of the other two wires will depend upon the age of your wiring. For wiring pre-April 2004, the live wire is red, and the neutral is black. For wiring post-April 2004, the live wire is brown, and the neutral is blue.
5. Disconnect the wires
Disconnect the wires from the old terminals by loosening the screws holding them in place. You may find it helpful to take a photo of the wires before you disconnect them, as this will make it easier to remember how they were connected when you up the new switch.
6. Insert the wires into the new faceplate
Connect the wires to the new switch in the same order and screw them in place. Again, it may help to refer to your photo if you’re unsure which wire goes where. Make sure your wires are fully inserted, with no bare metal showing. Secure the wires into the face plate in the correct locations and tighten the screws securely. The screws should lock down onto the copper wire, not the sheathing. Loose screws can present a fire hazard.
7. Secure the faceplate
For most people, when changing light switch covers, they do not need to make any changes to the mounting box. Once your wiring is complete, ease the light switch cover back into the mounting box and screw it into place, using a spirit level to ensure your light switch faceplate is level.
8. Power on and test
Restore the power supply and test that the light works as expected.
This guide on how to change a light switch assumes that you are fitting either a plastic or metal faceplate onto a plastic mount box, which is standard. If you have a metal mounting box, you must follow the manufacturer’s guidelines on installation and earthing your switch.
Changing light switch types
Your home’s electrical design will have been created to use a certain type of light switch safely. The most common types of light switches are 1-way, 2-way and 3-way. These terms do not represent the number of wires going into the box but rather how the switch is used to control your lights.
A 1-way switch will simply turn your lights on and off. A 2-way switch allows you to control your lights from two locations, such as the top and bottom of a staircase. A 3-way switch is used with another 3-way switch to control your lights from two different locations. This might be useful for a large room with light fittings in multiple locations.
Most homes will have 1-way switches controlling their lights, but it is not uncommon to find 2-way or 3-way switches if your home has been extended or renovated. If you are unsure which type of switch you need, it is best to speak to a qualified electrician who will be able to advise you on the best option for your home.
To change a 1-way switch to a 2-way or 3-way switch, you will need to add an extra wire between the two switches. This is known as a traveller wire and needs to be connected to the same terminals on both switches. The traveller wire carries the electrical current between the two switches, and it is usually coloured red.
If you are changing a 1-way switch to a 2-way switch, you will need to connect the traveller wire to the common terminal on the second switch. If you are changing to a 3-way switch, you will need to connect the traveller wire to one of the traveller terminals on the second switch.
It is not possible to change a 2-way or 3-way switch to a 1-way switch, as this would create an unsafe electrical circuit. If you want to replace a 2-way or 3-way switch with a 1-way switch, you will need to reconfigure your wiring so that the circuit only uses one switch.
Once you have connected the traveller wire, the rest of the process is the same as changing a 1-way switch, which we have outlined in our 8-step process above.
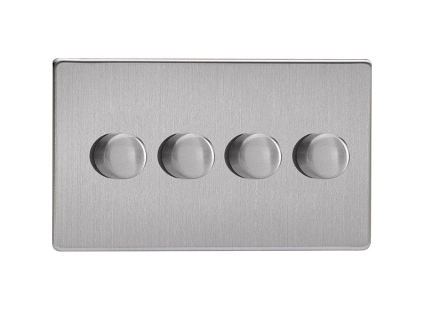
Dimmer Switches
You can install a dimmer switch as you would fit a regular light switch, allowing you to change the room’s ambience by adjusting the light level.
Dimmer switches are available in various styles, including rotary, push button and slide. Many also come with a built-in LED indicator so that you can easily find the switch in the dark.
When shopping for dimmer switches, it is important to make sure that you buy one that is compatible with your light bulbs. You can use LED bulbs with most dimmer switches, but some types of energy-saving bulbs may not be compatible.
Of course, you could opt for regular light switches and a smart light bulb that lets you set the colour and brightness of the light emitted. How times are changing!
FAQ
Follow our 8-step process to allow you to confidently change any light switch within your home.
Yes, you can change light switches yourself. However, if working with electricity worries you, or you are not clear on what needs to be done, we recommend you seek a qualified electrician’s assistance.
You need to turn off the power before replacing a light switch. Failing to do so could result in serious injury or even death. You should be able to locate the breaker specifically for your lighting circuit. Flip that and check that the power is off before commencing any electrical work.
Light switches all contain an earth wire. The purpose of this is to protect you from an electrical shock if your light switch becomes faulty.
To earth a light switch, simply connect the green and yellow earth wire to the appropriate terminal on the back of the switch.
If you find a bare earth wire, you must sheathe them in green and yellow sleeving.
Leave a Reply