If you’re looking to refresh your home’s decor or protect your radiator from corrosion, painting it is a great DIY project to consider. Painting a radiator may seem daunting, but with proper preparation and techniques, you can achieve a smooth and professional-looking finish. In this guide, we will walk you through the process of painting a radiator step-by-step, ensuring you achieve long-lasting and satisfactory results.
Key Takeaways
- Painting a radiator is a simple and effective way to refresh the look of your home’s decor.
- Proper preparation is essential for achieving a professional-looking finish.
- Use appropriate materials, such as radiator paint and suitable brushes.
- Apply multiple thin coats and allow ample drying and curing time between coats.
- Maintain your newly painted radiator by avoiding abrasive cleaners and regularly inspecting the paint for any signs of wear or damage.
Gathering the Materials
Before starting the process of painting your radiator, you will need to ensure you have all the materials necessary for the job.
Firstly, it is essential to choose the right type of paint for your radiator. A specialised radiator paint will provide the best results and help prevent the radiator from rusting. It is also important to use a brush suitable for painting radiators, such as a small to medium-sized brush with short, densely packed bristles.
You will also need sandpaper to sand the surface of the radiator, a degreasing cleaner to remove any dirt or grease, and masking tape to cover any surrounding areas you do not want to paint. Additionally, drop cloths or newspaper can be used to protect the floor or furniture underneath the radiator.
| Materials needed for painting a radiator |
|---|
| Radiator paint |
| Small to medium-sized hand wire brush with short, densely packed bristles |
| Sandpaper |
| Degreasing cleaner |
| Masking tape |
| Drop cloths or newspaper |
Using the correct materials and tools will help you achieve a professional-looking finish when painting your radiator.
Gathering the Materials
Before you begin to paint your radiator, you need to gather all the materials required to complete the job. Here are the items you’ll need:
| Materials | Description |
|---|---|
| Radiator paint | A high-quality paint designed specifically for use with radiators. Make sure to choose a colour that complements the room. |
| Brush | A suitable brush for painting radiators. Choose a brush with a width that will fit comfortably between the pipes. |
| Sandpaper | A fine-grit sandpaper to smooth the surface of the radiator before painting. |
| Masking tape | To protect areas you don’t want to paint, such as nearby walls or floors. |
| Drop cloths or newspaper | To protect the surrounding area from paint splatters and drips. |
| Degreasing cleaner | To clean the radiator before painting and remove any dust or grease that could interfere with adhesion. |
Once you have gathered all the materials, you’re ready to move on to preparing the radiator for painting.
Gathering the Materials
Before you begin painting your radiator, it’s important to gather all the necessary materials:
- Radiator paint
- Brush suitable for painting radiators
- Sandpaper
- Masking tape
- Drop cloths or newspaper to protect the surrounding area
- Degreasing cleaner
Make sure you have quality radiator paint that is suitable for use on radiators. Using the right paint is essential to ensure that the finish is long-lasting and can withstand the high temperatures radiators emit. Brushes designed for use on radiators are also important when painting, as they are designed to reach the nooks and crannies of the radiator without leaving brush marks.
When selecting sandpaper, choose a fine grit (such as 220 grit) to create a smooth surface on the radiator. The degreasing cleaner should be used to remove any dust or grease from the surface of the radiator before painting.
Use masking tape to cover any areas that you don’t want to paint, such as the wall or surrounding furniture. This will help ensure a neat finish without any accidental paint splatters. Lastly, use drop cloths or newspaper to protect the floor or surrounding surfaces from drips or spills.
Using the appropriate materials from the start will help ensure a smooth painting process.
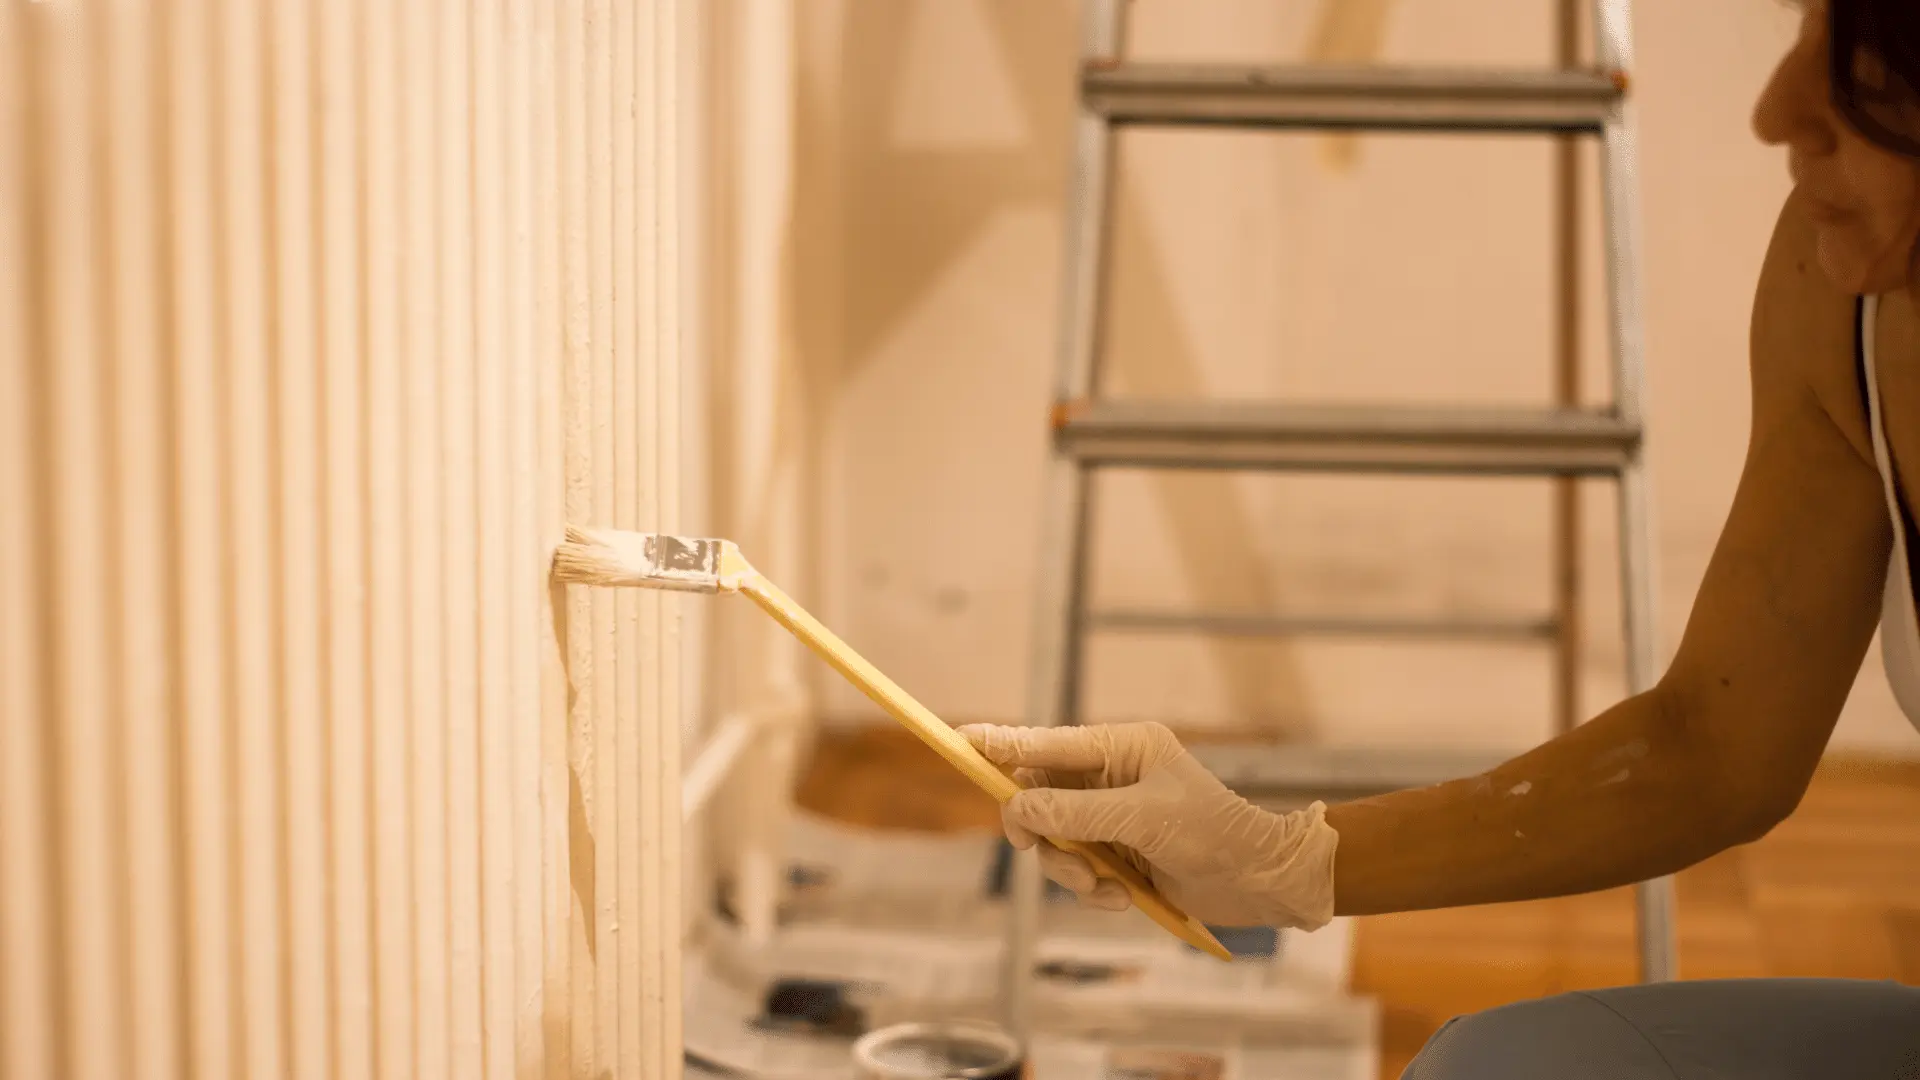
Applying the Paint
Once you have prepared your radiator and protected the surrounding area, it’s time to start painting. Follow these steps to achieve a professional-looking finish:
- Stir the paint: Before you start painting, stir the radiator paint thoroughly to ensure an even consistency.
- Paint the hard-to-reach areas: Use a small brush to paint the grooves and corners of the radiator. This will ensure that every part of the radiator is covered in paint.
- Paint the rest of the radiator: Use a larger brush to paint the rest of the radiator. Make sure to use smooth and even strokes, applying thin coats for better coverage and durability. Avoid overloading the brush to prevent drips or streaks.
- Apply multiple coats: Allow the paint to dry completely between coats, following the manufacturer’s instructions for drying time. Apply multiple thin coats of paint for better coverage and durability.
For best results, take your time and be patient. Don’t rush the process, and avoid applying too much paint at once. It’s better to apply multiple thin coats than one thick coat, as this will ensure a more even finish.
Tip: If you’re painting a large or intricate radiator, consider using a radiator brush. This will help you to reach all the parts of the radiator, including the back and sides.
Expert Tip
For a flawless finish, make sure to remove any excess paint on the brush before applying it to the radiator. This will prevent drips and streaks, giving you a more professional-looking result.
Drying and Curing
Once you have finished painting the radiator, allow the paint to dry completely. The drying time will depend on the type of paint you have used, but it is usually around 24 hours. It is important to let each coat dry fully before applying another to avoid smudging or damaging the finish.
Once the paint is dry, it is time to cure the radiator. Curing is the process of allowing the paint to harden fully and settle into place. This can take several days, so it is important to be patient and avoid using the radiator or touching it during this time.
If you turn on the heating too soon, it can cause the paint to bubble or peel off. To avoid this, leave the radiator to cure for at least 24 hours after the final coat of paint has been applied. This will ensure that the paint has fully hardened and will provide a durable finish that will last for years.
It is important to note that some paints may require longer drying or curing times, so always refer to the manufacturer’s instructions for the best results.
Top Tips:
- Avoid touching or using the radiator while it is drying and curing.
- Allow ample time for each coat of paint to dry fully before applying the next.
- Always follow the manufacturer’s instructions for drying and curing times.
- Do not turn on the heating until the paint has fully cured to avoid damaging the finish.
Painting a Radiator Cover
If you have a radiator cover, you can enhance the look of your room by painting it to match your radiator. Follow similar steps as painting the radiator itself, ensuring proper preparation and using appropriate paint and brushes.
Tip: If your radiator cover is made of metal, you may need to use a metal primer before applying the radiator paint for a better finish.
Here are the steps to follow when painting a radiator cover:
| Step | Description |
|---|---|
| 1 | Remove the cover from the radiator. This will enable you to paint it more easily and help you avoid getting paint on the radiator. |
| 2 | Use sandpaper to lightly sand the surface of the cover to create a smooth base for the paint. Clean the cover with a degreasing cleaner to remove any dust or grease. |
| 3 | Mask any areas you don’t want to paint with masking tape. Lay down drop cloths or newspaper to protect the floor or furniture underneath the cover. |
| 4 | Stir the radiator paint thoroughly to ensure an even consistency. Use a small brush to paint the hard-to-reach areas of the cover, such as the grooves and corners. Then, use a larger brush to paint the rest of the cover in smooth, even strokes. Apply multiple thin coats for better coverage and durability. |
| 5 | Allow the paint to dry completely between coats. Follow the manufacturer’s instructions for drying time. Once you have applied the final coat, leave the cover to cure for at least 24 hours before reassembling it. |
Tip: When choosing a paint colour for your radiator cover, consider complementary or contrasting colours that match the overall decor of the room. You can use colour swatches or visualisation tools to help you make the right choice.
Maintenance and Care
Proper maintenance and care can ensure that your newly painted radiator stays looking fresh and new for longer. Here are some tips to keep in mind:
- Avoid using abrasive cleaners on the surface of the radiator. Instead, use a soft cloth or sponge with mild soap and water to clean it periodically.
- Inspect the paint regularly for any signs of wear or damage, especially in areas that are prone to scratches, such as near the valves.
- Touch up any imperfections as soon as you notice them to prevent them from spreading and causing further damage.
- Avoid placing any objects directly on top of the radiator, as this can scratch the paint and cause damage.
- If you need to move the radiator, be sure to protect the surface with a soft cloth or cushioning material to prevent scratches.
By following these tips, you can keep your painted radiator looking its best for years to come.
In Summary
Painting a radiator is a rewarding DIY project that can enhance the look of your room and protect your radiator from corrosion. By following our step-by-step guide and using the right equipment and techniques, you can achieve a flawless finish that will last for years. Remember to take your time, be patient, and follow the proper maintenance and care instructions to keep your newly painted radiator looking its best.
Tips for a Flawless Finish
When painting a radiator, following a few tips can help you achieve a flawless finish.
Apply Thin Coats
Apply thin coats of paint to avoid drips and ensure even coverage. Thick coats can cause the paint to bubble and peel over time.
Allow Drying Time
Allow the paint to dry between coats. Rushing the process can cause the paint to smudge or peel. Follow the manufacturer’s instructions for drying time.
Remove Excess Paint
Remove excess paint on the brush before applying to the radiator. This will prevent drips and streaks and create a smoother finish.
Inspect for Wear and Damage
Regularly inspect the painted surface for any signs of wear or damage. Touch up as needed to maintain the protective barrier and preserve the aesthetic appeal.
Be Patient
Take your time and be patient with the painting process. Rushing can result in an unprofessional-looking finish that may require additional touch-ups and time-consuming corrections.
By following these tips and techniques, you can achieve a professional-looking radiator paint job that will enhance the beauty of your home for years to come.
Conclusion
Painting a radiator can be a straightforward DIY project that can transform the look of your room. By following our step-by-step guide and using professional techniques, you can achieve a flawless finish that is tailored to the unique climate conditions in the UK. Remember to take proper precautions and allow for adequate drying and curing time to ensure long-lasting results.
Tips for Success
For a professional-looking finish, make sure to apply thin coats and allow ample drying time between coats. Remove any excess paint on the brush to prevent drips or streaks. Take your time and be patient to achieve a flawless result.
Maintenance and Care
To maintain the freshly painted radiator, avoid using abrasive cleaners on the surface. Instead, use a soft cloth or sponge with mild soap and water to clean it periodically. Regularly inspect the paint for any signs of wear or damage and touch up as needed.
Final Thoughts
Painting a radiator can be a fun and rewarding DIY project that can update the look of your space, protect your radiator from corrosion, and extend its lifespan. With our comprehensive guide, you now have all the information and knowledge needed to paint your radiator like a professional. Follow our steps, take your time, and enjoy the process of refreshing your radiator with a brand new coat of paint.
FAQ
How do I paint a radiator?
To paint a radiator, follow our step-by-step instructions to achieve a professional-looking finish. Start by gathering the necessary materials, including radiator paint, a brush suitable for painting radiators, sandpaper, masking tape, drop cloths or newspaper, and a degreasing cleaner. Then, prepare the radiator by cooling it down, sanding the surface, and cleaning it with a degreasing cleaner. Next, mask and protect the surrounding area with masking tape and drop cloths. Apply the paint using small brushes for hard-to-reach areas and larger brushes for the rest of the radiator. Allow the paint to dry between coats and cure for at least 24 hours before turning the heating back on. For a flawless finish, take your time, apply thin coats, and follow proper maintenance and care guidelines.
What materials do I need to paint a radiator?
To paint a radiator, you will need radiator paint, a brush suitable for painting radiators, sandpaper, masking tape, drop cloths or newspaper, and a degreasing cleaner.
How should I prepare the radiator before painting?
Before painting a radiator, ensure it has cooled down. Then, lightly sand the surface with sandpaper to create a smooth base for the paint. Clean the radiator with a degreasing cleaner to remove any dust or grease.
How do I protect the surrounding area when painting a radiator?
To protect the surrounding area when painting a radiator, use masking tape to cover any areas you don’t want to paint. Lay down drop cloths or newspaper to safeguard the floor or furniture underneath the radiator.
How do I apply the paint to a radiator?
To apply the paint to a radiator, start by stirring the radiator paint thoroughly. Use a small brush to paint hard-to-reach areas, such as grooves and corners. Use a larger brush for the rest of the radiator, applying the paint in smooth, even strokes. Apply multiple thin coats for better coverage and durability.
How long does the paint on a radiator take to dry?
The drying time for radiator paint varies depending on the manufacturer’s instructions. Allow each coat of paint to dry completely before applying the next coat.
Can I paint a radiator cover?
Yes, you can paint a radiator cover to match your radiator. Follow similar steps as painting the radiator itself, ensuring proper preparation and using appropriate paint and brushes.
How do I maintain and care for a painted radiator?
To maintain a painted radiator, avoid using abrasive cleaners on the surface. Instead, use a soft cloth or sponge with mild soap and water to clean it periodically. Regularly inspect the paint for any signs of wear or damage and touch up as needed.
What are some tips for achieving a flawless finish when painting a radiator?
For a flawless finish when painting a radiator, apply thin coats of paint and allow ample drying time between coats. Remove any excess paint on the brush to prevent drips or streaks. Take your time and be patient to achieve a professional-looking result.
Can painting a radiator be a DIY project?
Yes, painting a radiator can be a straightforward DIY project that can transform the look of your room. By following our step-by-step guide and using professional techniques, you can achieve a flawless finish that is tailored to the unique climate conditions in the UK. Remember to take proper precautions and allow for adequate drying and curing time to ensure long-lasting results.
Leave a Reply